Start indexing your logs in 30 minutes!
This is a quick start guide for Splunk. Start indexing your logs from a remote server using Splunk forwarder.
NOTE: If you are indexing up-to 500MB of logs per day, then you can use Free Splunk!
Setup
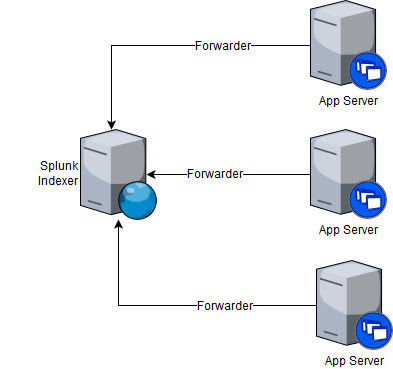
We would be installing Splunk on a master node [UNIX]. This will serve as the main Splunk server which will index the logs and display it via UIThe logs would be indexed from your remote application servers using Splunk Forwarder
 |
| Diag.1 Setup |
Installing Splunk + Indexer
Download the Splunk Setup files (.tgz) from hereOn the UNIX Server:-
- Extract the archive
# tar -xvf splunk-7.0.0-xxxxx-Linux-x86_64.tgz - Start Splunk
# cd splunk/bin
# ./splunk start
(accept license agreement) - Login to the UI and change default admin password!
| Diag 2. First time login screen |
| Diag 3. Change password |
That's it for the Splunk + Indexer setup.
You should not be able to view the UI
Setup forwarding
For Splunk to be able to receive data from the remote application servers, we need to setup Forwarding and ReceivingOn the Splunk UI -
Now, we need to setup a port on which Splunk would listen. For this example, I am choosing 9997. Feel free to use any unused port (Tip: use netstat to check the ports in use)
In the next section, we would be setting up the forwarder to send data at this port
Install Forwarder (on Application Server)
Download the setup files (.tgz) from here
On the UNIX Server:
- Create a directory for splunkforwarder and extract archive
mkdir /opt/splunkforwarder
tar -xvf /path/to/downloaded/archive.tgz -C /opt/splunkforwarder - Start splunk forwarder and enable it to start at boot
cd /opt/splunkforwarder/bin
./splunk start --accept-license
./splunk enable boot-start - Update Admin password
./splunk edit user admin -password [password] -role admin -auth admin:changeme - Add forwarding to the main Splunk Server
./splunk add forward-server [splunk-hostname]:9997 -auth admin:[password] - Add your log files to monitor
./splunk add monitor /location/of/log/file
That's it!
No comments:
Post a Comment